
For many homeowners, the drywall stage is the first time their new home truly begins to feel real.
Once the drywall is installed, rooms suddenly have shape. You can imagine where your furniture will go, picture family gatherings in the living room, and finally get a sense of how your home will feel.
It is also one of the stages that generates the most questions.
Many homeowners walk through their home during drywall finishing and wonder:
“Is it supposed to look like this?”
The answer is almost always yes.
Before paint is applied, drywall goes through several finishing stages, and it often looks much rougher than homeowners expect.
Understanding the process will help you know what you’re seeing and what comes next.
The timeline depends on the size and complexity of the home, weather conditions, and drying time between coats.
For many custom homes, drywall installation and finishing takes one to three weeks.
Homes with higher ceilings, extensive trim details, or construction during cooler or more humid weather may require additional time because each coat of joint compound must dry before the next coat can be applied.
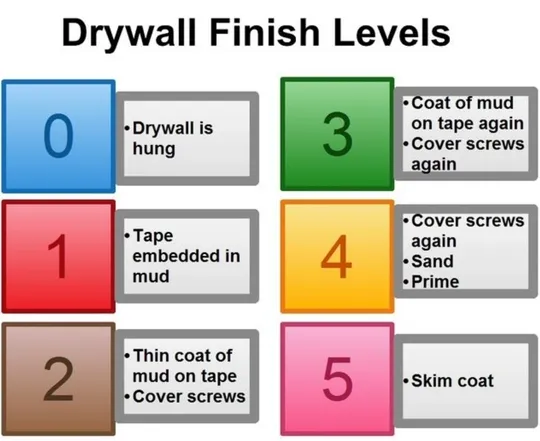
The Gypsum Association recognizes five primary levels of drywall finish.
Each level builds upon the previous one.
Level 0 means the drywall has been hung but no finishing work has begun.
There is:
This stage is simply the starting point.
At Level 1, drywall tape has been embedded into joint compound over the seams and corners.
The surface still looks rough and unfinished.
This is completely normal.
You’ll often see this stage early in construction before additional coats are applied.
Level 2 adds another coat of joint compound over the taped joints, fasteners, and corners.
This finish is commonly used in garages, utility spaces, and areas where appearance is not the primary concern.
It is generally not considered a finished wall for living spaces.
Level 3 includes another coat of joint compound to further smooth the joints and fasteners.
Although the walls look much better, additional finishing is still required before painting.
This level is often used when heavy wall textures will be applied.
Level 4 is the standard finish used in many new homes today.
By this stage:
For many painted walls with standard lighting conditions, a Level 4 finish provides an attractive appearance.
Level 5 is the highest level of drywall finish.
After completing a Level 4 finish, the drywall contractor applies a thin skim coat across the entire wall surface.
This creates a more uniform appearance and helps minimize visible imperfections under certain lighting conditions.
It depends on the room.
A Level 5 finish is often recommended in areas with:
These lighting conditions can highlight even minor surface imperfections.
The skim coat used in a Level 5 finish helps create a more consistent appearance when light reflects across the wall.
If your home features large open spaces with abundant natural light, discussing a Level 5 finish with your builder may be worthwhile.
This is one of the most common concerns homeowners have during construction.
Before sanding, priming, and painting, drywall often appears uneven.
You may notice:
These are all normal parts of the finishing process.
The appearance changes dramatically after the walls are sanded, primed, and painted.
Patience during this stage is important because the finished product looks very different from what you see during construction.
Your walkthrough is a great opportunity to ask questions.
Consider asking your builder:
Your builder should be happy to explain the process and what you can expect over the coming days.
Although homeowners often focus on flooring, cabinets, and paint colors, the quality of the drywall finish has a significant impact on how your home looks for years to come.
A properly finished wall provides the foundation for every paint color, piece of artwork, and decorative feature you’ll add after move-in.
Understanding the drywall process helps you appreciate the craftsmanship that goes into creating smooth, beautiful walls throughout your home.
At McMahon Custom Homes, we believe homeowners should understand what’s happening inside their home, not just admire the finished product.
Throughout our Land-to-Keys™ process, we walk our clients through every major construction milestone, explain what they’re seeing, and answer questions before they become concerns.
If you’re planning to build a custom home in Goochland, Richmond, Chesterfield, Midlothian, Henrico, Hanover, Powhatan, or the surrounding areas, we’d be happy to show you how thoughtful planning and quality craftsmanship come together long before the paint goes on the walls.